Microblading Healing Process Day by Day | HD Studio
At HD Studio, we understand that microblading is not just a beauty treatment—it is an investment in your confidence and appearance. One of the most common questions we hear is about the healing process after microblading. Knowing what to expect day by day helps reduce stress, ensures proper aftercare, and gives you peace of mind.
In this detailed guide, we are going to take you through the microblading healing stages, day by day, so you feel prepared and informed.
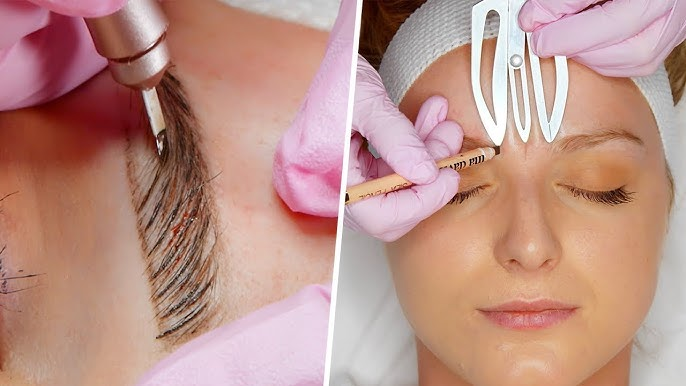
Day 1: Freshly Done Brows – Bold and Defined
On the very first day, your eyebrows look fresh, bold, and darker than expected. This is completely normal. The pigment sits on the skin surface and may seem sharper than your desired shade. Your brows may also feel slightly tender, swollen, or tight—similar to a mild sunburn.
- Avoid touching or rubbing your brows.
- Keep them dry and clean.
- Apply the recommended aftercare ointment lightly if instructed.
At this stage, your eyebrows are still open wounds, so proper hygiene is key to preventing infection.
Day 2 – 4: Darkening and Mild Sensitivity
By day two, you may notice your brows look even darker. Do not worry—this is part of the healing process. The color appears intense because the skin is still healing and holding onto excess pigment.
- Some mild redness and tenderness may remain.
- Brows may feel slightly itchy as the skin begins to repair.
- Do not apply makeup near the brows.
These first few days are the most delicate. Think of your brows like tiny scratches healing on your skin.
Day 5 – 7: Scabbing and Peeling Begins
This is where many people feel nervous. Your brows will begin to scab and peel, which can look patchy. Some pigment may flake off with the scabs, making your eyebrows appear uneven or lighter in spots.
- Resist the urge to pick or scratch.
- Let the scabs fall off naturally.
- Keep applying ointment as directed.
This stage is temporary. Picking scabs can cause pigment loss and scarring, so patience is very important.
Day 8 – 10: Brows Look Patchy and Faded
During this stage, many clients feel alarmed because their brows look too light or faded. The pigment appears to have disappeared. This is normal and happens because a fresh layer of skin is healing over the pigment, making it look softer and lighter.
- Brows may look “ghosted.”
- This is not the final result.
- Avoid sun exposure and sweating.
This phase is often called the “ugly duckling stage,” but it is just part of the process. Your brows will return.
Day 11 – 14: Softening Stage
By now, the peeling has stopped, and your eyebrows start to look more natural. The color is still soft, but the pigment is settling beneath the surface. Your brows might look lighter than expected, but don’t worry—they will darken slightly as the skin continues to heal.
- Brows look more even.
- Texture and flaking are gone.
- Normal skincare routine can slowly resume (but avoid strong exfoliants).
This is when your brows begin to reveal their real shape and design.
Day 15 – 21: Color Returns and Brows Take Shape
Around the two-week mark, your brows begin to regain their true color. The pigment that seemed to disappear earlier resurfaces as the skin fully heals.
- Brows appear fuller and more natural.
- Color looks closer to the final healed result.
- Any uneven patches will even out after the touch-up session.
You’ll notice your brows start to match the natural look you were hoping for.
Day 22 – 30: Brows Fully Healed
By the end of the first month, your brows are mostly healed. The pigment has settled into the skin, and the strokes look soft and natural.
- Brows should no longer feel sensitive.
- Final healed color is visible.
- Shape looks balanced and defined.
At this stage, your brows look like natural, beautifully shaped eyebrows.
The 6-Week Touch-Up: Perfecting Your Brows
Even after full healing, a touch-up appointment is essential. Around the six-week mark, we perfect your brows by filling in any gaps, adjusting the color, and ensuring symmetry.
- Touch-up secures long-lasting results.
- Adds depth to faded areas.
- Extends the life of your microblading.
Skipping your touch-up can shorten the lifespan of your results, so this step is crucial.
Tips for a Smooth Healing Process
To ensure your brows heal beautifully:
- Keep brows dry during the first 7–10 days.
- Avoid saunas, swimming pools, and heavy sweating.
- Do not apply makeup directly on your brows until healed.
- Use a gentle cleanser to wash your face.
- Always protect your brows from the sun.
With proper aftercare, your microblading results can last 1–3 years.
Why Choose HD Studio for Microblading in Dubai?
At HD Studio, we specialize in nano brows and microblading techniques that deliver natural, lasting results. We guide you through every step, from the first consultation to the final touch-up. Our clients appreciate the detailed aftercare support we provide so that healing feels stress-free and predictable.
- Phone number: +971 58 686 5951
- Email: [email protected] | [email protected]
- Location: Park Center Mirdif, 1st Floor, Shop F33
Your brows deserve the best care, and we are here to ensure you enjoy the process from start to finish.
Final Thoughts on Microblading Healing Stages
The microblading healing process day by day is a journey of transformation. From bold freshly-done brows to natural, healed results, each stage is part of achieving the perfect shape and color. With patience, proper aftercare, and a professional touch-up, your brows will look stunning and long-lasting.
If you are considering microblading in Dubai, let us guide you with expertise and care. Your confidence is worth it.